
Installing Minecraft PE / Bedrock Maps on iOS
In this section, we offer various tutorials for installing maps in formats such as .McWorld, .McPack, .ZIP, or .RAR. The MC formats are straightforward to install and are predominantly used for newer maps.
Facing difficulties importing content with iOS 13.3?
FIX: Upgrade to iOS 13.3.1! This update should resolve your problems, allowing you to import content to Minecraft seamlessly.
If problems persist, consider using the Documents by Readdle app for iOS!
.McWorld
Installing this file type is straightforward. Just click on the download link. Occasionally, you might be directed to sites like Dropbox or MediaFire. Ensure you navigate to a page with an “Open in Minecraft PE” prompt, then click on it to initiate the map loading.
iPhone, iPad or Other iOS Device (.ZIP / .RAR)
This guide focuses on .ZIP and .RAR file formats, which are typically associated with older maps available on our website.
1. Navigate to the App Store. Download and set up the “Documents” application (link provided).
2. Search for a desired map within our map section.
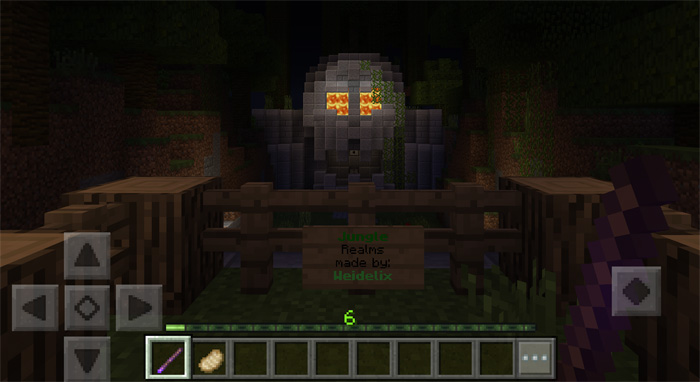
For this example, I’ll be downloading and installing the Jungle Realms map. Locate and click the download button at the page’s end.
You might be taken to a hosting site like Dropbox or MediaFire. For MediaFire, it’s straightforward – simply hit the download button.
On the other hand, if you land on Dropbox, there might be a few pop-up windows to close before you can proceed with the download.
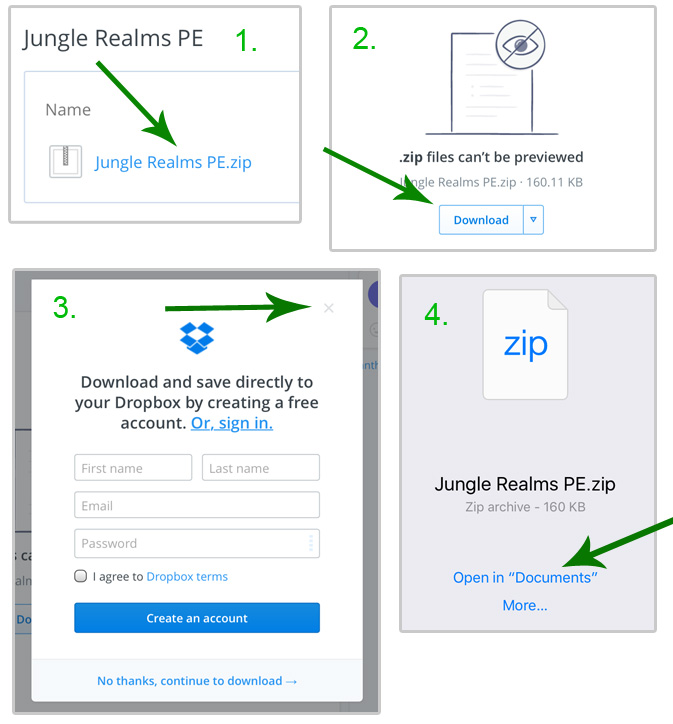
3. After choosing to open the .ZIP or .RAR file with “Documents”, the app will launch, and a confirmation prompt will appear. Click on “OK”.
4. Tap on the .ZIP file (for this example, “Jungle Realms PE”). Upon doing this, the file will start extracting, and shortly after, a new folder should appear.
Click on the map folder to open it.
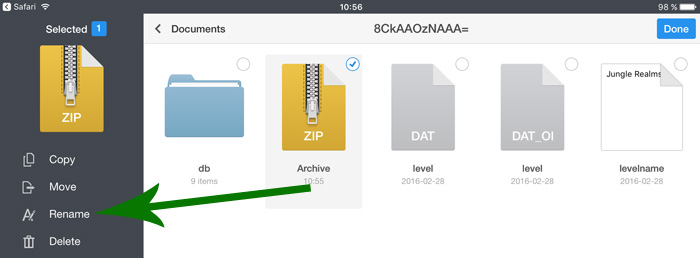
5. Tap on the “Edit” button located at the top right of the screen and select all files and potential folders displayed. Afterward, tap “Zip” on the left sidebar.
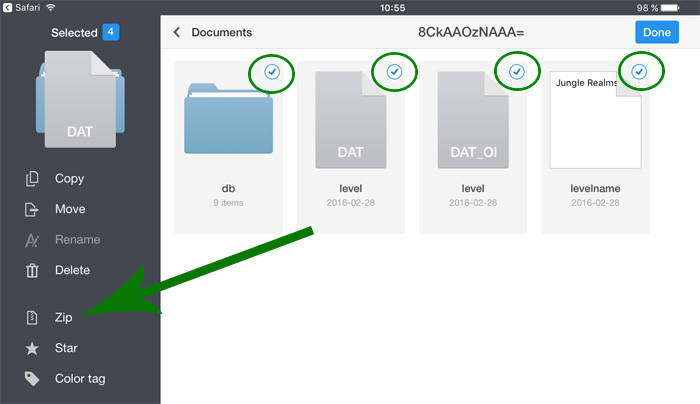
6. Uncheck all files, leaving only the new .ZIP file selected. Next, click on “Rename” in the left sidebar.
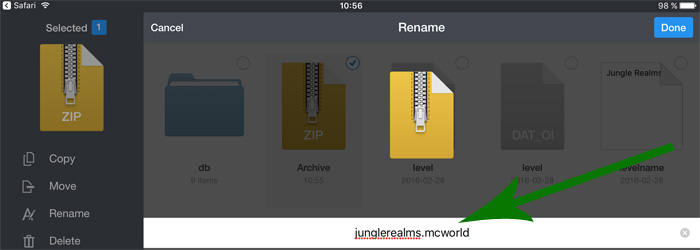
7. Change the file name to a different title, ensuring that it concludes with the .mcworld extension.
In this case I named it: junglerealms.mcworld
Press Done.
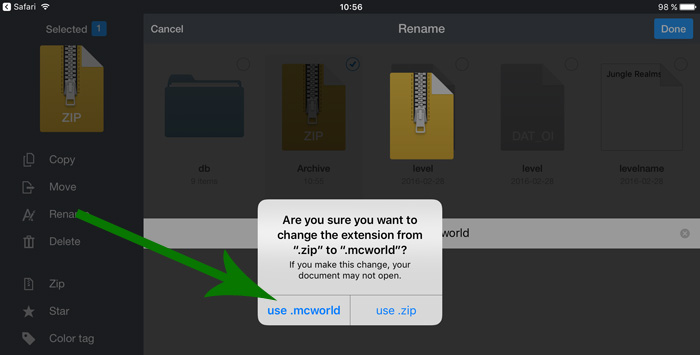
8. A notification will pop up. Click on “use .mcworld” to proceed.
9. Choose the .mcworld file (here, it’s junglerealms.mcworld) and tap on “Open in,” which is located in the bottom left sidebar.

10. Minecraft will now initiate and create the new world. This method is compatible with most maps that are in .ZIP or .RAR formats.
Computer
1. Start by acquiring iFunBox on your computer. This no-cost file management tool is available for both Windows and Mac systems. Execute the installer and set up the software on your machine.
2. Connect your iOS device to your computer using the data transfer cable.
3. Search for a desired map within our map section.
4. Launch the iFunBox program that you’ve recently set up on your computer. In the top-left corner, select the “File Browser” option.
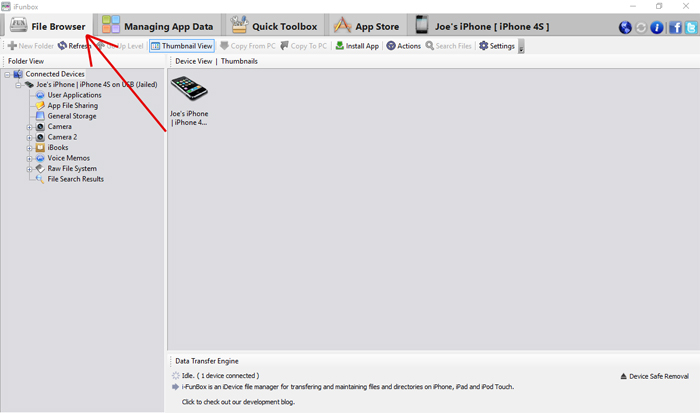
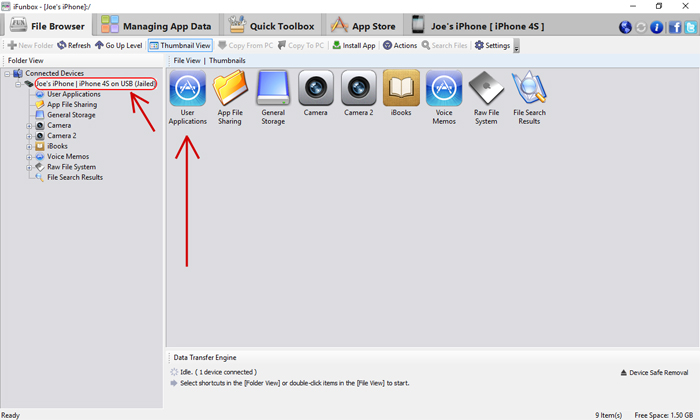
5. In the left sidebar, locate and double-click on your device’s name. For this instance, the device is labeled as “Joe’s iPhone | iPhone 4S on USB (Jailed)”.
Then click on “User Applications”.
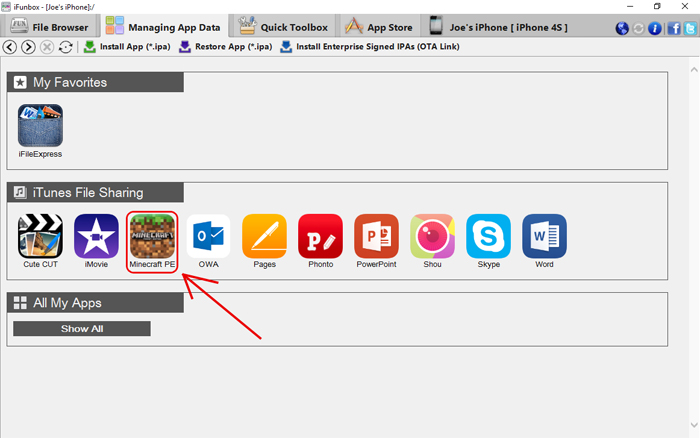
6. Click the Minecraft PE icon.
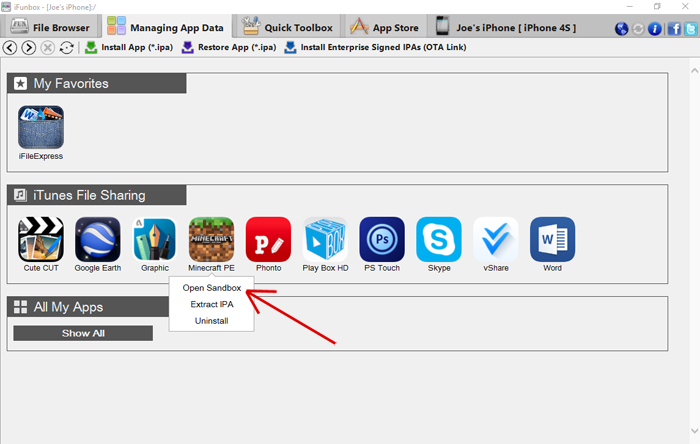
7. Select Open Sandbox.
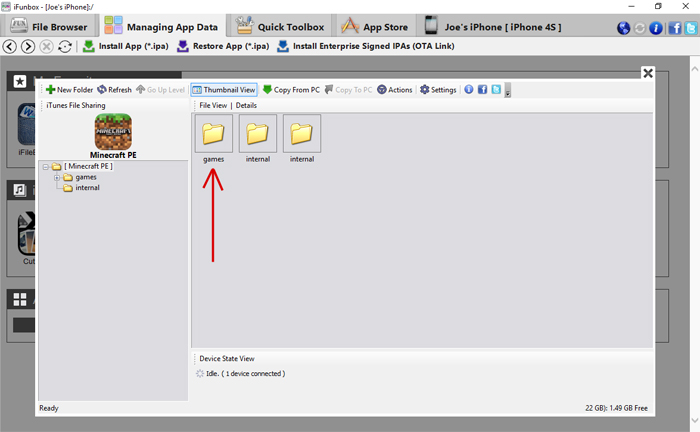
8. Double-click the games folder.
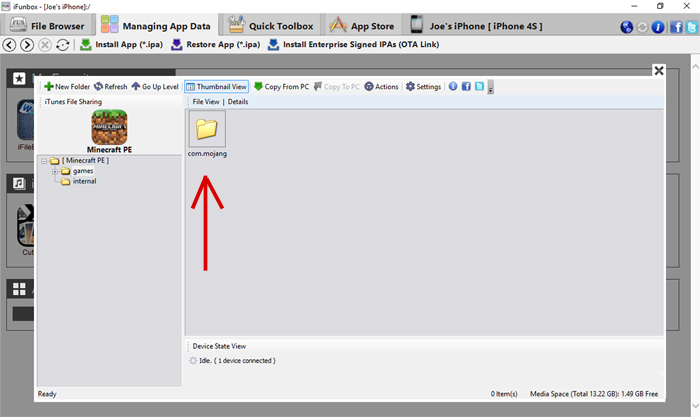
9. Double-click the com.mojang folder.
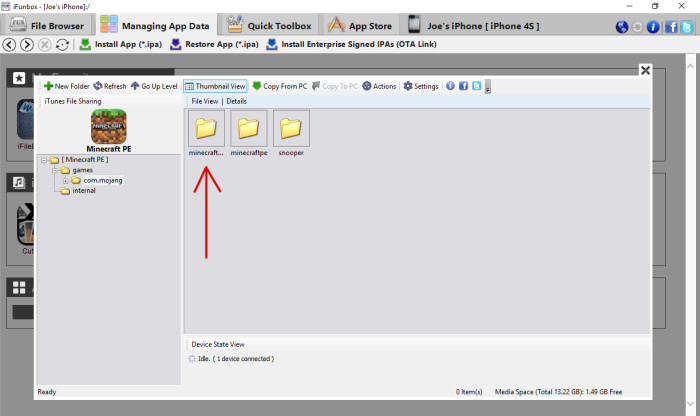
10. Hover over the folder names to view their full titles if they aren’t fully visible. Locate the “minecraftWorlds” folder and double-click on it.
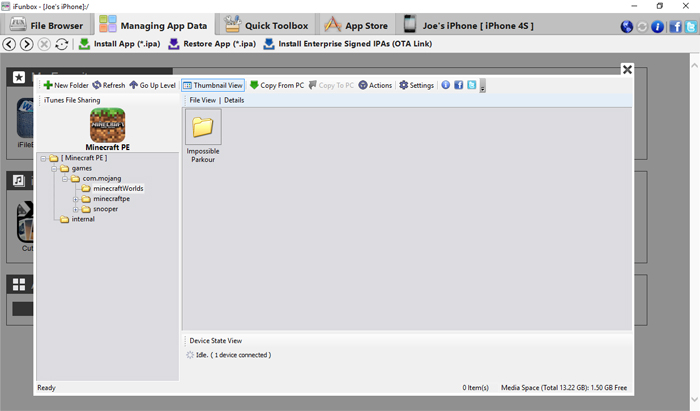
11. This location contains all of your Minecraft worlds. Think of a world as a map. Locate the map you had earlier downloaded from the MCPE DL’s map section and transfer it here.
By default, when you download maps, they are saved under USER > Downloads for both Windows and Mac. Typically, these maps are downloaded as compressed zip files.
For Mac users, simply clicking a zip file will open it. However, to open rar files, you’ll need to use WinRAR. For Windows users, compressed files, whether zip or rar, can be opened using WinRAR.
Ensure you only move the main map folder into the “minecraftWorlds” directory.
Are you yearning for more than the standard Minecraft PE experience? Mods can immensely elevate your gameplay. While Minecraft Bedrock is already packed with content, enhancing it with your personal touch could redefine your gaming journey. Concerned about How to install Minecraft PE / Bedrock Maps for iOS? We’ve got you covered with all the essentials. Our guide will walk you through the process, ensuring a hassle-free experience. While there are various ways How to install Minecraft PE / Bedrock Maps for iOS, we focus on the most straightforward and clear method. Dive into exclusive features and get a leg up on your rivals. Don’t settle for mundane tasks – boost your game with the right mod. Our comprehensive guide “Installing Minecraft PE / Bedrock Maps for iOS” will ensure a smooth setup if followed correctly. Sift through available mods to pick the one that suits you best. If in doubt, revisit our tutorial “Installing Minecraft PE / Bedrock Maps for iOS” to ensure you’re on the right track with the installation sequence. Precision is key during setup. If the process feels daunting initially, it gets simpler with time and practice. Should you encounter issues, double-check to ensure no step is overlooked. With persistence, you’ll master the mod setup and optimize your gaming approach. After all, who wouldn’t want an enriched Minecraft PE experience? Dive in and enjoy!